Definition
The Document Write node writes information into Documents, making it easier to create or update Workspace document content within the workflow.
How to Configure
1. Add a Target Document
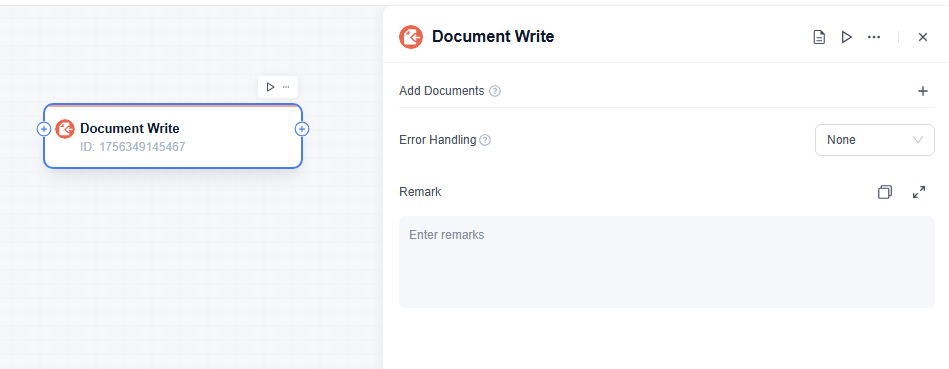
Add a "Document Write node" to the canvas, then tap the node to configure it on the right.
Here are three options to add a target document.
- Choose: Choose or directly select a document from the directory to write to.
- Create: Create a new document under the specified folder.
- Variables/Expressions: Locate the document to be written to or create a new document by document path and name.
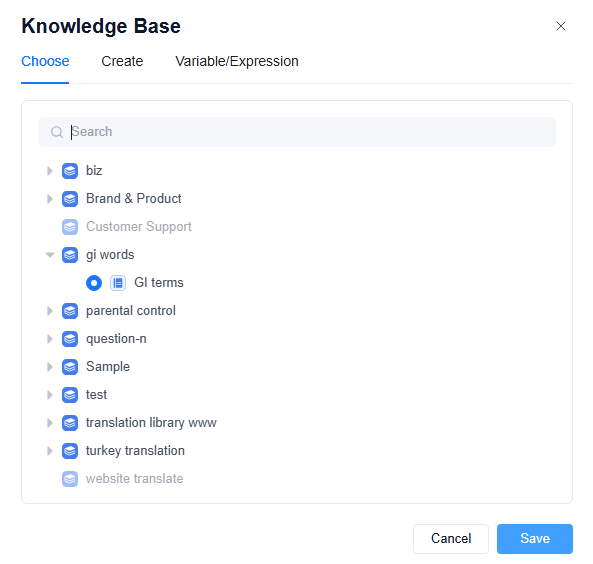
Option A: Choose an Existing Document
- Click "+" in the pop-up window.
- Tap "Choose".
- Browse or search for the specific folder you want to update (e.g., "gi words").
- Select it and click "Save".

Option B: Create a New Document
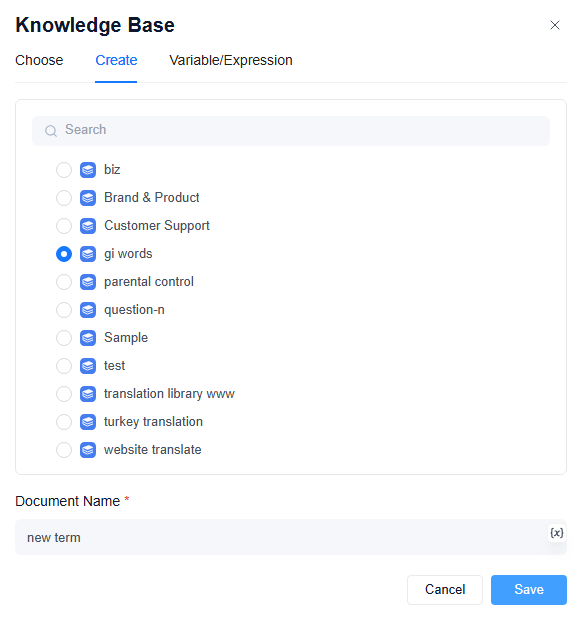
- Click the "Create" tab.
- Select the folder where you want the new document to live.
- Set the "Document Type". Options include:
• Rich Text Document: Can contain images and text formatting. Usually used to store enterprise knowledge for document Q&A.
• Code or Plain Text Document: Plain text, usually used to store code, prompts, or workflow configuration files.
- In the "Document Name" field, type a unique name or insert a variable for your new document.
- Click "Save".
Option C: Use a Variable for the Document Path (Advanced)
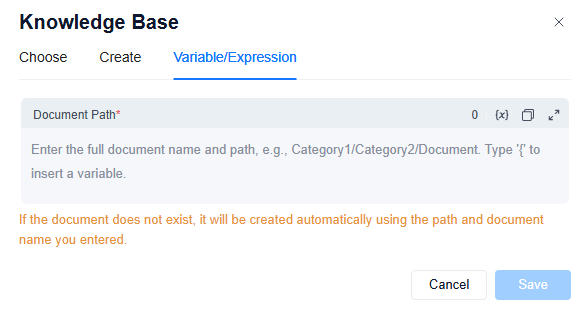
- Click the "Variable/Expression" tab.
- Select the "Document Type" and enter the "Document Path" (e.g., Folder1/Folder2/Document). The path field supports variables.
Usage Tip: Both "Create" and "Variable/Expression" options allow you to customize the document name and type. If a document with the exact name and type already exists in the folder, the node selects it by default. If it does not exist, the node creates a new document.
2. Define the Write Mode
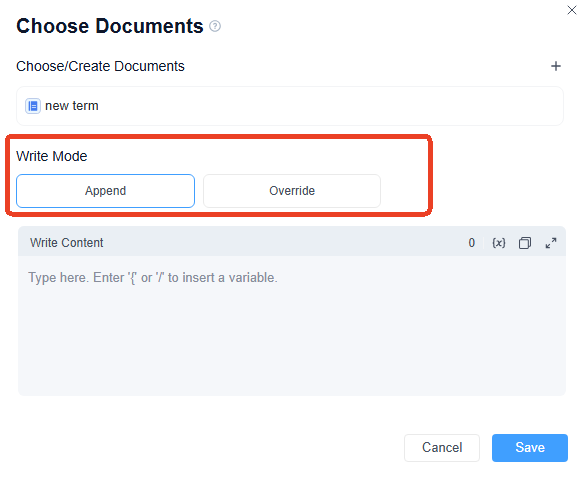
After selecting or creating your document, you must set how the node handles the content if the document already exists.
- Append: Adds new content to the end of the existing document. The original content remains.
- Override: Replaces all existing content in the document with your new content. The old content is cleared.
3. Write Content
In the "Write Content" box, type the text you want to save into the document.
- You can type plain text.
- You can insert variables by typing { or / to use dynamic content from your workflow.
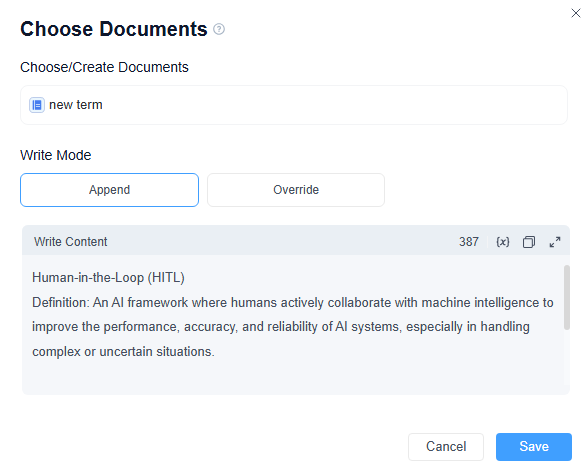
Click the "Save" button to apply your settings to the Document Write node.
Now, when your AI workflow reaches this node, it will perform the specified action: saving new content to a new document or updating an existing one based on your chosen mode.
Usage Examples
The Document Write node accurately stores workflow data into target documents, standardizing data management. Actual application scenarios include:
- Enterprise data document construction: Design workflows to use crawlers to capture industry information and product introductions. After cleaning and sorting, use the Document Write node to write them into corporate documents in Markdown and other formats for employees to review.
- Customer service data retention: The customer service workflow collects customer inquiries and feedback in real time, categorizes them, and writes analysis documents through the Document Write node to review services, identify high-frequency issues, and optimize responses.
How to Write to Personal Data
To write content to the current workflow executor's Personal Data, use the variable provided by the Start node in the Document Write node: {{#START.$PersonalDataPath#}}.
This variable represents the current workflow user's own Personal Data directory.
In Add Target Document, select Variable/Expression, then configure the document path as {{#START.$PersonalDataPath#}}/Document Name.
For example: {{#START.$PersonalDataPath#}}/Memory.
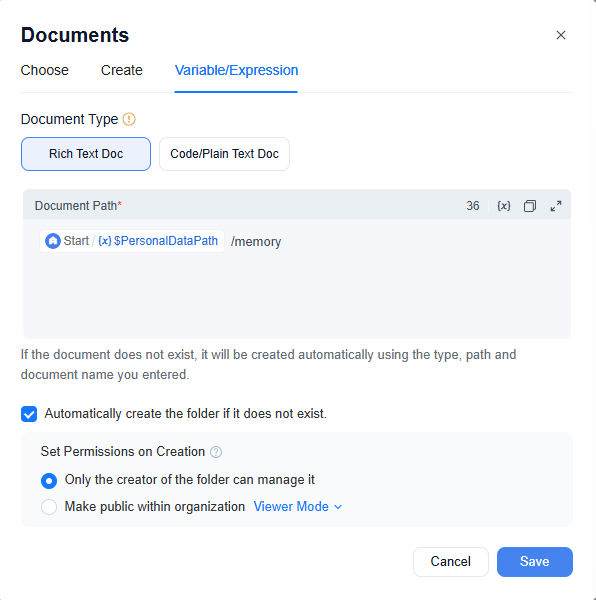
This way, when different users run the same workflow, the Document Write node writes to the corresponding document under each user's own Personal Data, rather than a shared document. If the target document does not exist, the Document Write node automatically creates it based on the configuration before writing content.
Error Handling for the Document Write Node
The Document Write node supports writing to multiple documents simultaneously. In actual use, some documents may write successfully while others fail due to incorrect paths, inaccessible target documents, or insufficient permissions.
When an error occurs during node execution, you can choose different error handling methods:
| Error Handling Method | Description |
|---|---|
| None | If the node fails, an error is reported and the workflow ends. |
| Ignore Error | If the node fails, the error is ignored and the subsequent process continues. |
| Error Branch | If the node fails, the current path is interrupted and redirected to the configured error handling branch. |
When Ignore Error is selected, the system provides the Ignore Scope setting to control the impact of the error:
| Ignore Scope | Description |
|---|---|
| Failed Only | Only documents that fail to write are ignored. Other documents write normally. |
| Whole Node | If any document fails to write, the entire node ignores the error. |
If multiple target documents are configured in one Document Write node, we recommend selecting Failed Only based on your business needs. This ensures that even if one document fails, others can still write successfully, preventing a single failure from stopping the entire node.


Leave a Reply.